Total Pageviews

Follow Me on Pinterest

Saturday, April 12, 2014

Vintage-style Handmade Greeting Cards using G45's Botanical Tea Collection


Today I would like to share with you four cards I made using Graphic 45 Botanical Tea paper collection.  I love this collection--it's just beautiful.  Lots of floral images and pretty springtime colors.

There are 24 different papers to choose from (12 front and back double-sided) so the possibilities are endless.  It comes with 12 images that work very well on cards for the focal point, and I have chosen to use them in the cards I am showing you today.

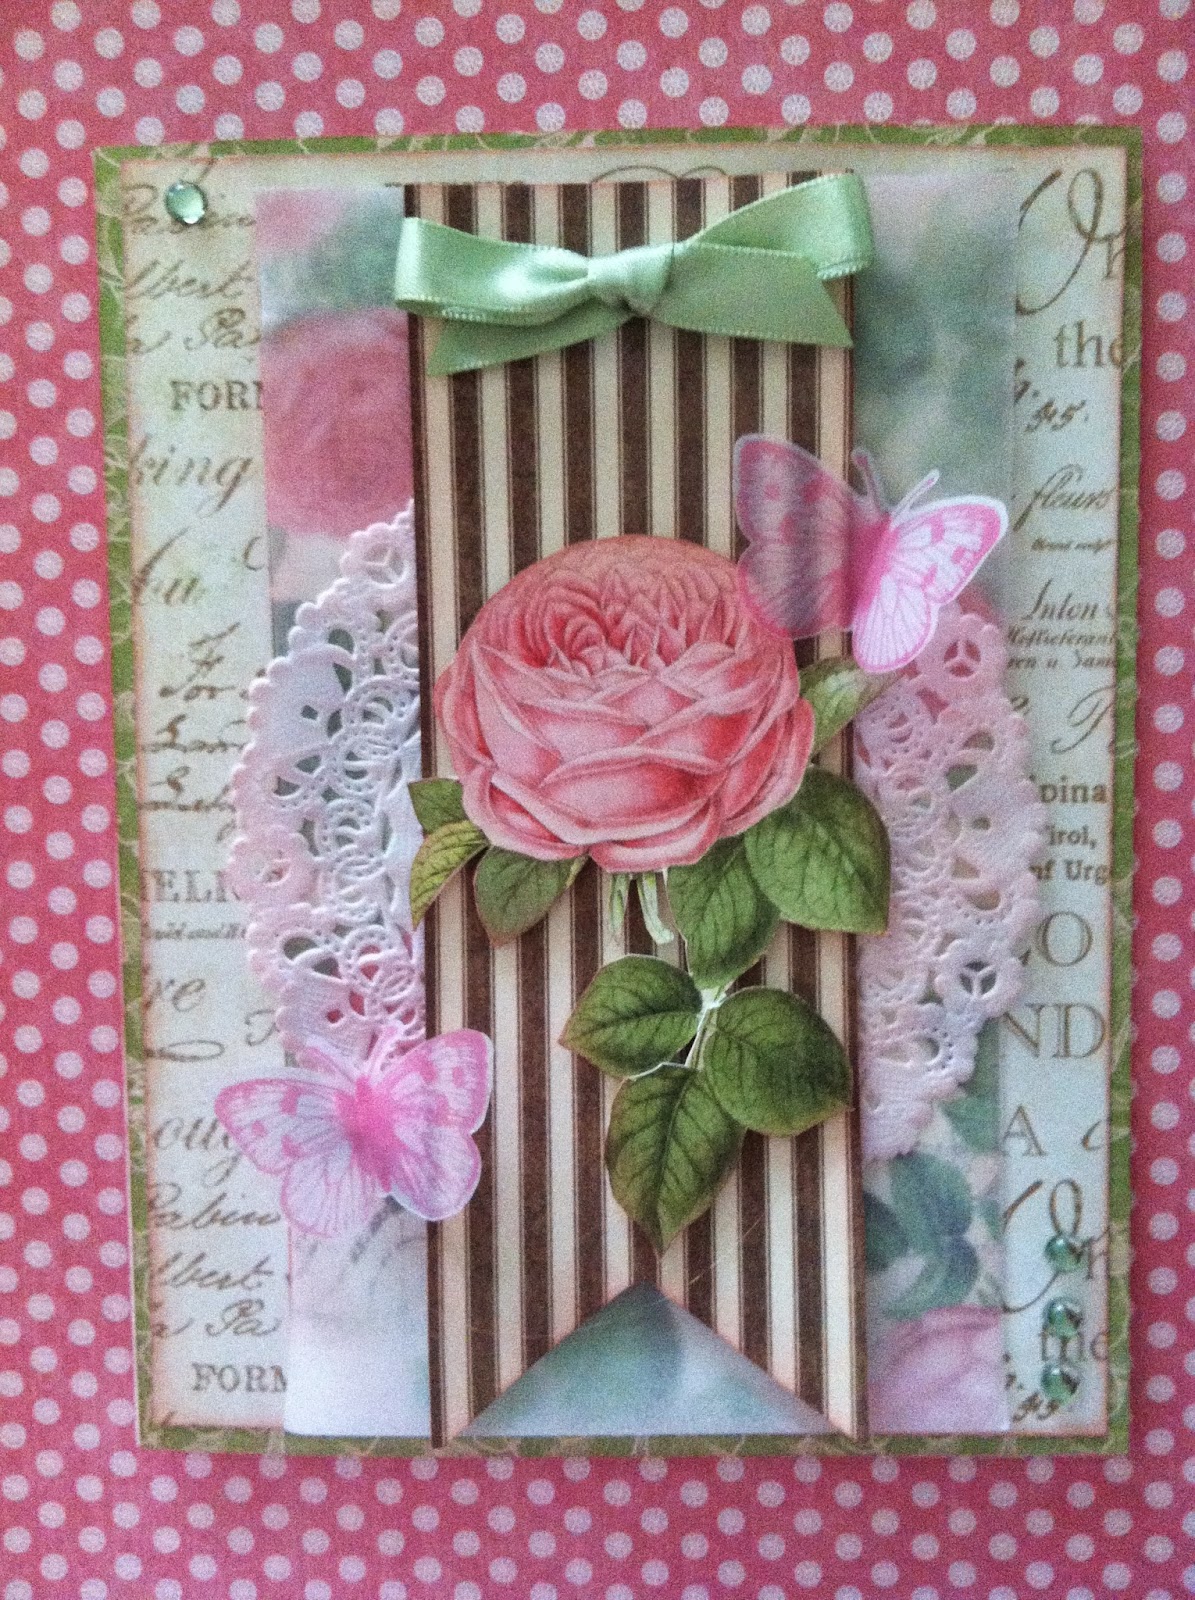
The first card I made was this one featuring the large rose image.
I used a doily to accentuate the rose.
I stamped two butterflies on vellum to flutter around the pretty rose!
The stamp and die is from Hero Arts
I considered several stamps for my vellum stamping effect.

At this point I knew I wanted to use the vellum, but hadn't decided exactly what I would do.
Here I considered using the dogwood image, and had stamps out ready to go! 

There are 24 different papers to choose from (12 front and back double-sided) so the possibilities are endless.  It comes with 12 images that work very well on cards for the focal point.
Oops almost forgot these nice papers!
I liked the way the dragonfly stamp looked on the vellum,  especially using silver ink.
I played around with the butterfly vellum as an overlay
before I finally decided to cut out the butterflies.
Wow, loving the way this looks.  I'll figure out a way to use this for sure!
Love the way the colors are seen through the vellum...very romantic!
I finally decided that I would cover the rose paper with a vellum sheet, and highlight the rose.
Layering the pattern papers, I selected the striped paper for behind the rose.  I think it looks regal!

I fussy-cut out the rose image and centered it on the card.
Victorian Velvet distress ink was used on the edges of all the paper layers.
Stunning!
Came back to the dogwood image...I think I'll save this idea for another day...
I do this a lot when I design, putting papers on top of one another...
Its a way for me to imagine what the card will look like.
I saw this image and thought to myself, SEED PACKET!
Here is the finished seed packet card.  I just love it!
I got out my seed packet stamp from the Garden Variety II set from Papertrey Ink.
There are several coordinating dies for this set, and the set is quite versatile!
Using the patterned paper, I cut out the words for the sentiment.
I stamped the seed packet with the word CARNATIONS.  
It looks pretty but something didn't seem right...but what?
Can you guess?
Yep!  I forgot to stamp the seed packet.  I had to re-stamp it.
Just messing around here.  Wanted to see what a rose would look like in this seed packet!
I think it looks good!  But not this card...maybe next time?
The re-stamped finished seed packet card is at the end of this post.
This card was quick and easy.  It just looks difficult but I promise it isn't.
I simply put patterned paper on the card face, and layered the floral image with a mat,
 then popped up the image with dimensional tape.  I cut a doily in half and tucked it underneath the paper.
Added a few droplets and a ribbon and it's finished!
Oh I have an extra butterfly!  It might look nice on this card!
What do you think?
This card was the highlight of the group!  I wanted to keep with using the vellum theme, so I stamped the fern in green ink on the velum and placed it over the patterned paper.  It softened it a bit.  I used my Martha Stewart punch for the bottom lace effect, and also used real fabric lace on this card.  The bird was fussy-cut out of the paper collection.
Once again I cut the sentiment from the patterned paper.
I also used a few roses from Wild Orchid Crafts.
The branch is a die cut from Memory Box, and worked perfectly for this card!

The Botanical Tea paper collection has endless possibilities for you so let your creative juices flow and give it a try!
If you would like to make the cards in this post, please leave me a comment with a way to contact you.
OR call Ink Paper Rubber in Overland Park KS,
so if you are local to the Kansas City area, please call them at 913-3981-2217 to enroll.  
Kits may be purchased for those of you who cannot attend class or who are from out of town/state/country etc.  

THE CARDS IN REVIEW


I hope you enjoyed this post, and liked the cards!  Please post any questions or comments below.  I love hearing from you all, and always will answer you back if you write me!

My next class at IPR will be a home decor project.  A birdhouse!
Check back to see a sneak-peek next week!

Happy Creating!
ReNae

Friday, April 11, 2014

Spring Update!

Hello Dear Bloggers!
I feel like I have fallen into an abyss!  Like everyone else, the last few months have been very busy for me.  Unfortunately my blog suffered.  Hopefully I will get you updated soon!
I would like to post some photos of the projects I worked on during Christmas, Valentine's Day and Easter.  Then we should be almost up to date!
If you scroll down to the end of the page,  you have an  opportunity to leave me a comment or suggestion.  PLEASE DO SO!  Just click on Post a Comment.  And don't forget to click on JOIN THIS SITE While you're there!  You will receive notification every time I post a new entry! You can also subscribe to the comments.  I am ramping up the blog for Spring and Summer, lots of projects and lots of fun!  I hope you'll join me!

Here are my projects from the past few months:

My new shelf
My flowers and laces are finally organized!
Inks Paints and Sprays on the bottom
Christmas Card I made for a swap
Christmas Card I made for a friend
For a class, I was given these images and asked to design cards for Valentine's Day
I started brainstorming, putting laces, flowers and pearls on the image,  to see what inspired me.


Sometimes I layer different colors of paper on cards to see what color pops out at me...
Here is what I came up with...#1
#2
#3
#4
My student Shari Lindsay, is getting the hang of it...
Shari and her Mom, Mary Kay Dorrell are busy at work making Valentines!

Beautiful!  Good job Shari!
Gorgeous!
Oh Dear, that snow storm dropped 10 inches of snow here in Kansas City!
Better stay home and make cards!

A deconstructed Make n Take 


In my second class, Glenda Griffin made these beauties.
We changed the blue ribbon to burgundy on this card and I like the way it turned out very much!


Great job Glenda!
In my Sweet Sentiments Class, I designed four cards.
Here is #1
Close up of #1
I used Spellbinders Die #    and added glitter to the aqua paper.

#2

Variation of #2
#3 
Close up of #4
#4 was made by embossing a stamped background then adding the image, pearls, lace and a ribbon.

#3 was simple assemblage with flower trim 
Beautiful! 
This was not part of a class, but made with the same paper.
This  one I gave to my mom.
I used a Spellbinders Die and let the paper do the work.
Close-up
I bought this stamp set by Taylored Expressions.
Sometimes it is good to try something new.


But my favorite style will always be vintage!

I hope you enjoyed seeing these cards, and 
that they will inspire you to try some of your own vintage cards!
If you have questions or comments please leave me a note in the comment section.
My next post will be featuring the cards I designed using Botanical Tea Collection by Graphic 45.

Happy Creating!
ReNae