

Bloggers!
My last post I told you I would be posting "tomorrow"... well so much for that!
I have been very busy since my last post, the Secret Garden Card Tutorial. If you had a chance to make any of the cards, please email me at jewelrymkr@gmail.com and send me a photo of what you made! I would love to post them here. For that matter, anything at all that you make, just take a photo and send it to me and I'll post it for all to see! We have readers from all over the world... I am so humbled by all the people I meet and interact with here at Crabtree Creations!
Okay, let's talk about what I've been doing lately...
I taught a class at Ink Paper Rubber last month called French Country Cards. This class was so fun, and I think you'll like the cards. The second class using this Graphic 45 paper line will be sometime in July. The schedule will be out soon. I also have another class in July called C'est la vie! It is an interactive mini-album inside of an altered wooden cigar box. It will be AMAZING! I will be giving you more information in a subsequent post, so stay tuned!
The cards I designed for French Country turned out really pretty I think.
Here they are:

Part II of the French Country Vintage Card series will be in July. Please call Jen at 913-381-2217, INK PAPER RUBBER for more information and class schedules.
Part II will include four more cards using this wonderful paper. Here are some photos from my brainstorming session...
I hope you enjoyed this post and that you will give some of these cards a try!
In my next post I will be talking about our next big project!
IT IS AMAZING!!! Until then,
Happy Creating!
ReNae
My last post I told you I would be posting "tomorrow"... well so much for that!
I have been very busy since my last post, the Secret Garden Card Tutorial. If you had a chance to make any of the cards, please email me at jewelrymkr@gmail.com and send me a photo of what you made! I would love to post them here. For that matter, anything at all that you make, just take a photo and send it to me and I'll post it for all to see! We have readers from all over the world... I am so humbled by all the people I meet and interact with here at Crabtree Creations!
Okay, let's talk about what I've been doing lately...
I taught a class at Ink Paper Rubber last month called French Country Cards. This class was so fun, and I think you'll like the cards. The second class using this Graphic 45 paper line will be sometime in July. The schedule will be out soon. I also have another class in July called C'est la vie! It is an interactive mini-album inside of an altered wooden cigar box. It will be AMAZING! I will be giving you more information in a subsequent post, so stay tuned!
The cards I designed for French Country turned out really pretty I think.
Here they are:
 ti ti |
| This card was made using a premade card base measuring 5 x 6.5 inches. Then I used Glossy Accents on the main focal image, then sprinkling very fine glitter on the Glossy Accents while it was still a bit tacky. It gave the illusion of fruit you see with sugar on it, kinda like in fruit bowls. I cut the image then matted it with card stock, then popped it up with pop dots. Fleur de lis trim was adhered to top and bottom, and I tied a florist's bow and placed it at the base of the pear image. I used three colors of seam binding for the bow. |
 |
| This card, measuring 5 x 6.5 inches utilized several images from the paper line. I fussy cut out the girl, and placed her on pop dots in front of the barn image. Then I cut out a fence with a Impression Obsession die, and popped it in front of the girl, allowing her left hand to reach over the fence to pick a flower. Flowers were fussy cut out of paper, and also were attached to the card giving it dimension. It was absolutely gorgeous. |
 |
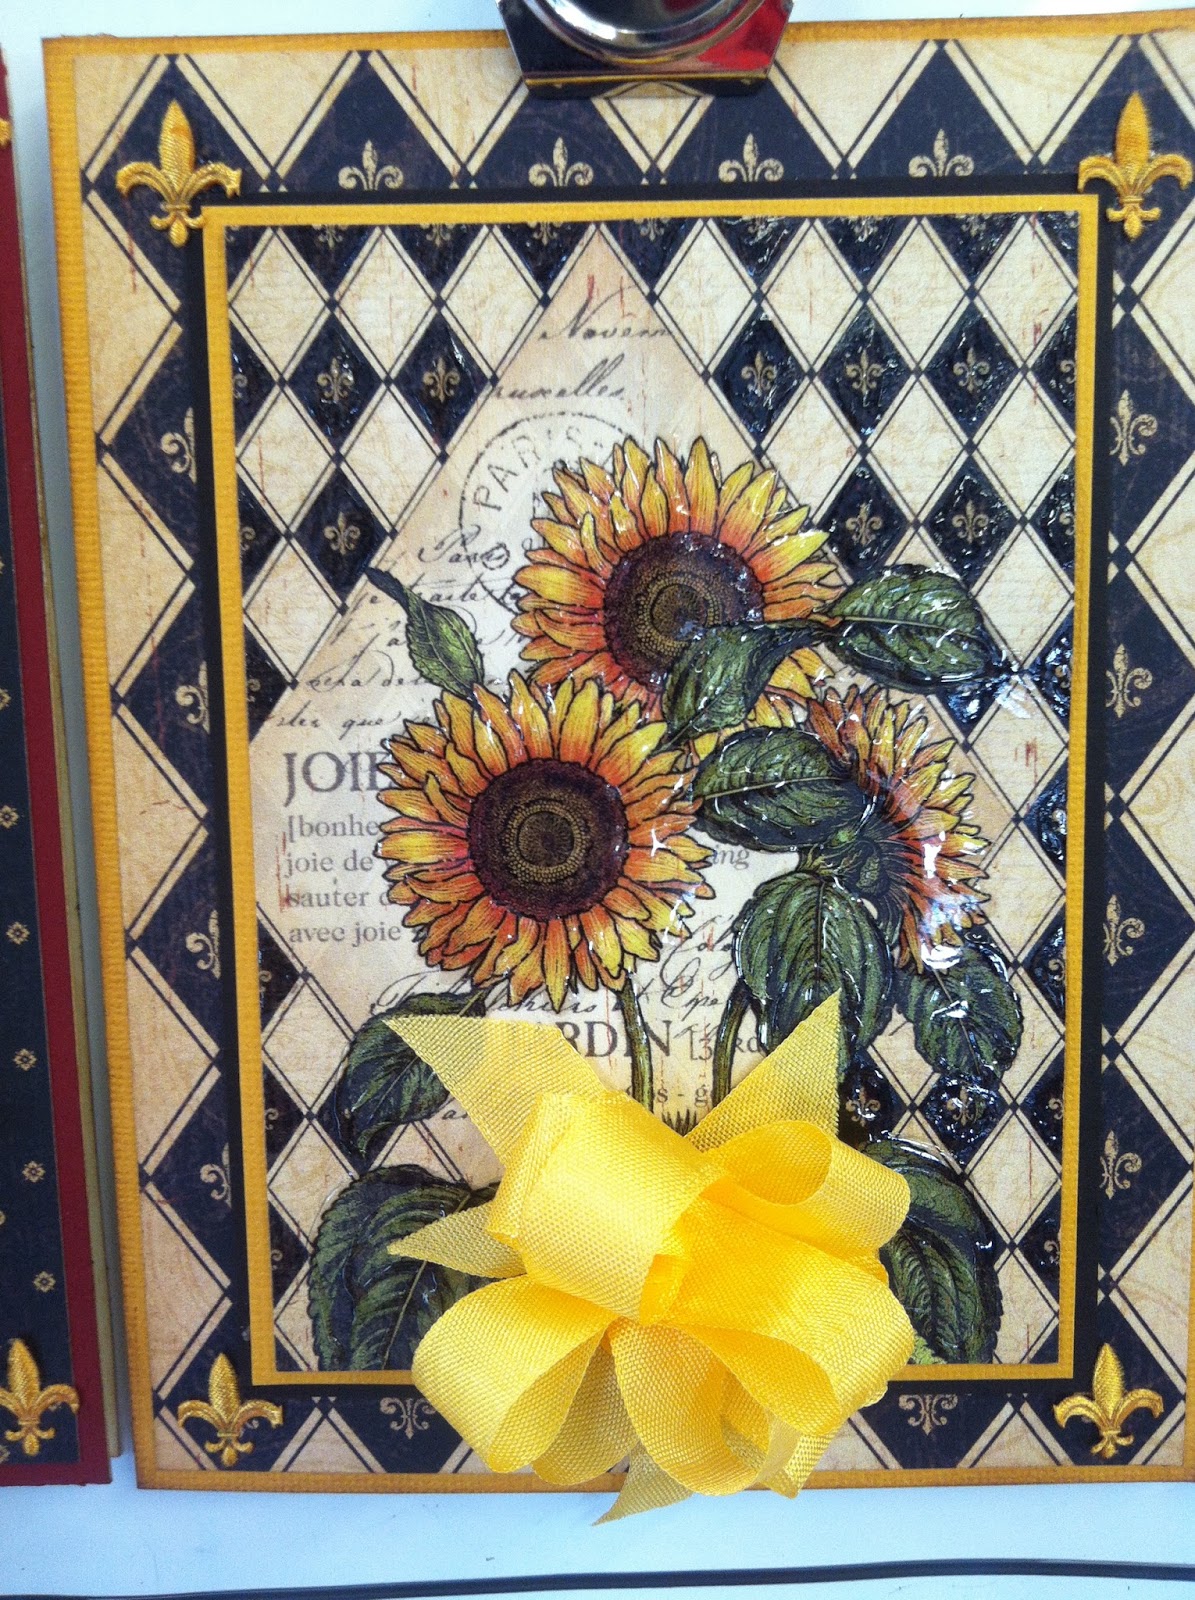
| The sunflower card was a shiny gem! Using Glossy Accents, I shined up this card by applying the medium to all of the diamond shapes, and also the floral images and leaves. A fleur de lis from the trim was placed in each corner. I then matted it on yellow card stock and popped it up. The background used a similar paper featuring the diamond shapes. A yellow florist's bow was placed at the base of the sunflower image. |
 |
| This card gave the illusion of sugar on the fruit similar to the pear card, however a different technique was used. This time I painted on Rock Candy Distress Stickles where I wanted the "sugar" to be. It was very pretty, just not as shiny as the pear card. I placed three cut outs of the fruit images in a line, matted them, then Stickled them up! Black lace was adhered to the base of the images, with seam binding on the top. A bow was tied with the same binding ribbon. Here are some photos of the cards we made in class: |
 |
| The Pear Card |
 |
| The Sunflower Card |
 |
| The Farm Girl Card |
 |
| The Mixed Fruit Card |

 |
| JoAnn tales a moment to smile for the camera! |
 |
| You can actually see the girl "picking" the flower right off the card! |
 |
| This student has made her girl a big garden! |
Part II will include four more cards using this wonderful paper. Here are some photos from my brainstorming session...
 |
| Nope, this does NOT look like a sunflower! It looks like a Brown-Eyed Susan! |
I have so many fun ideas but here are a few for you to see... My creative process includes putting the paper down in front of me along with the embellishments then placing them together to see what works!  |
| Here we go! A smaller flower makes this look much more like a sunflower! |
 |
| I am sorry about this, if you turn your head you can see it better ! LOL! Basically I just play around with the paper and other items until I find something that I like, and that looks really nice. How do you create? Write me a comment telling me your creative process and we will compare notes! I'm sure I could learn a LOT from all of you! |
 |
| It's kinda cute?! |
In my next post I will be talking about our next big project!
IT IS AMAZING!!! Until then,
Happy Creating!
ReNae


